End result:
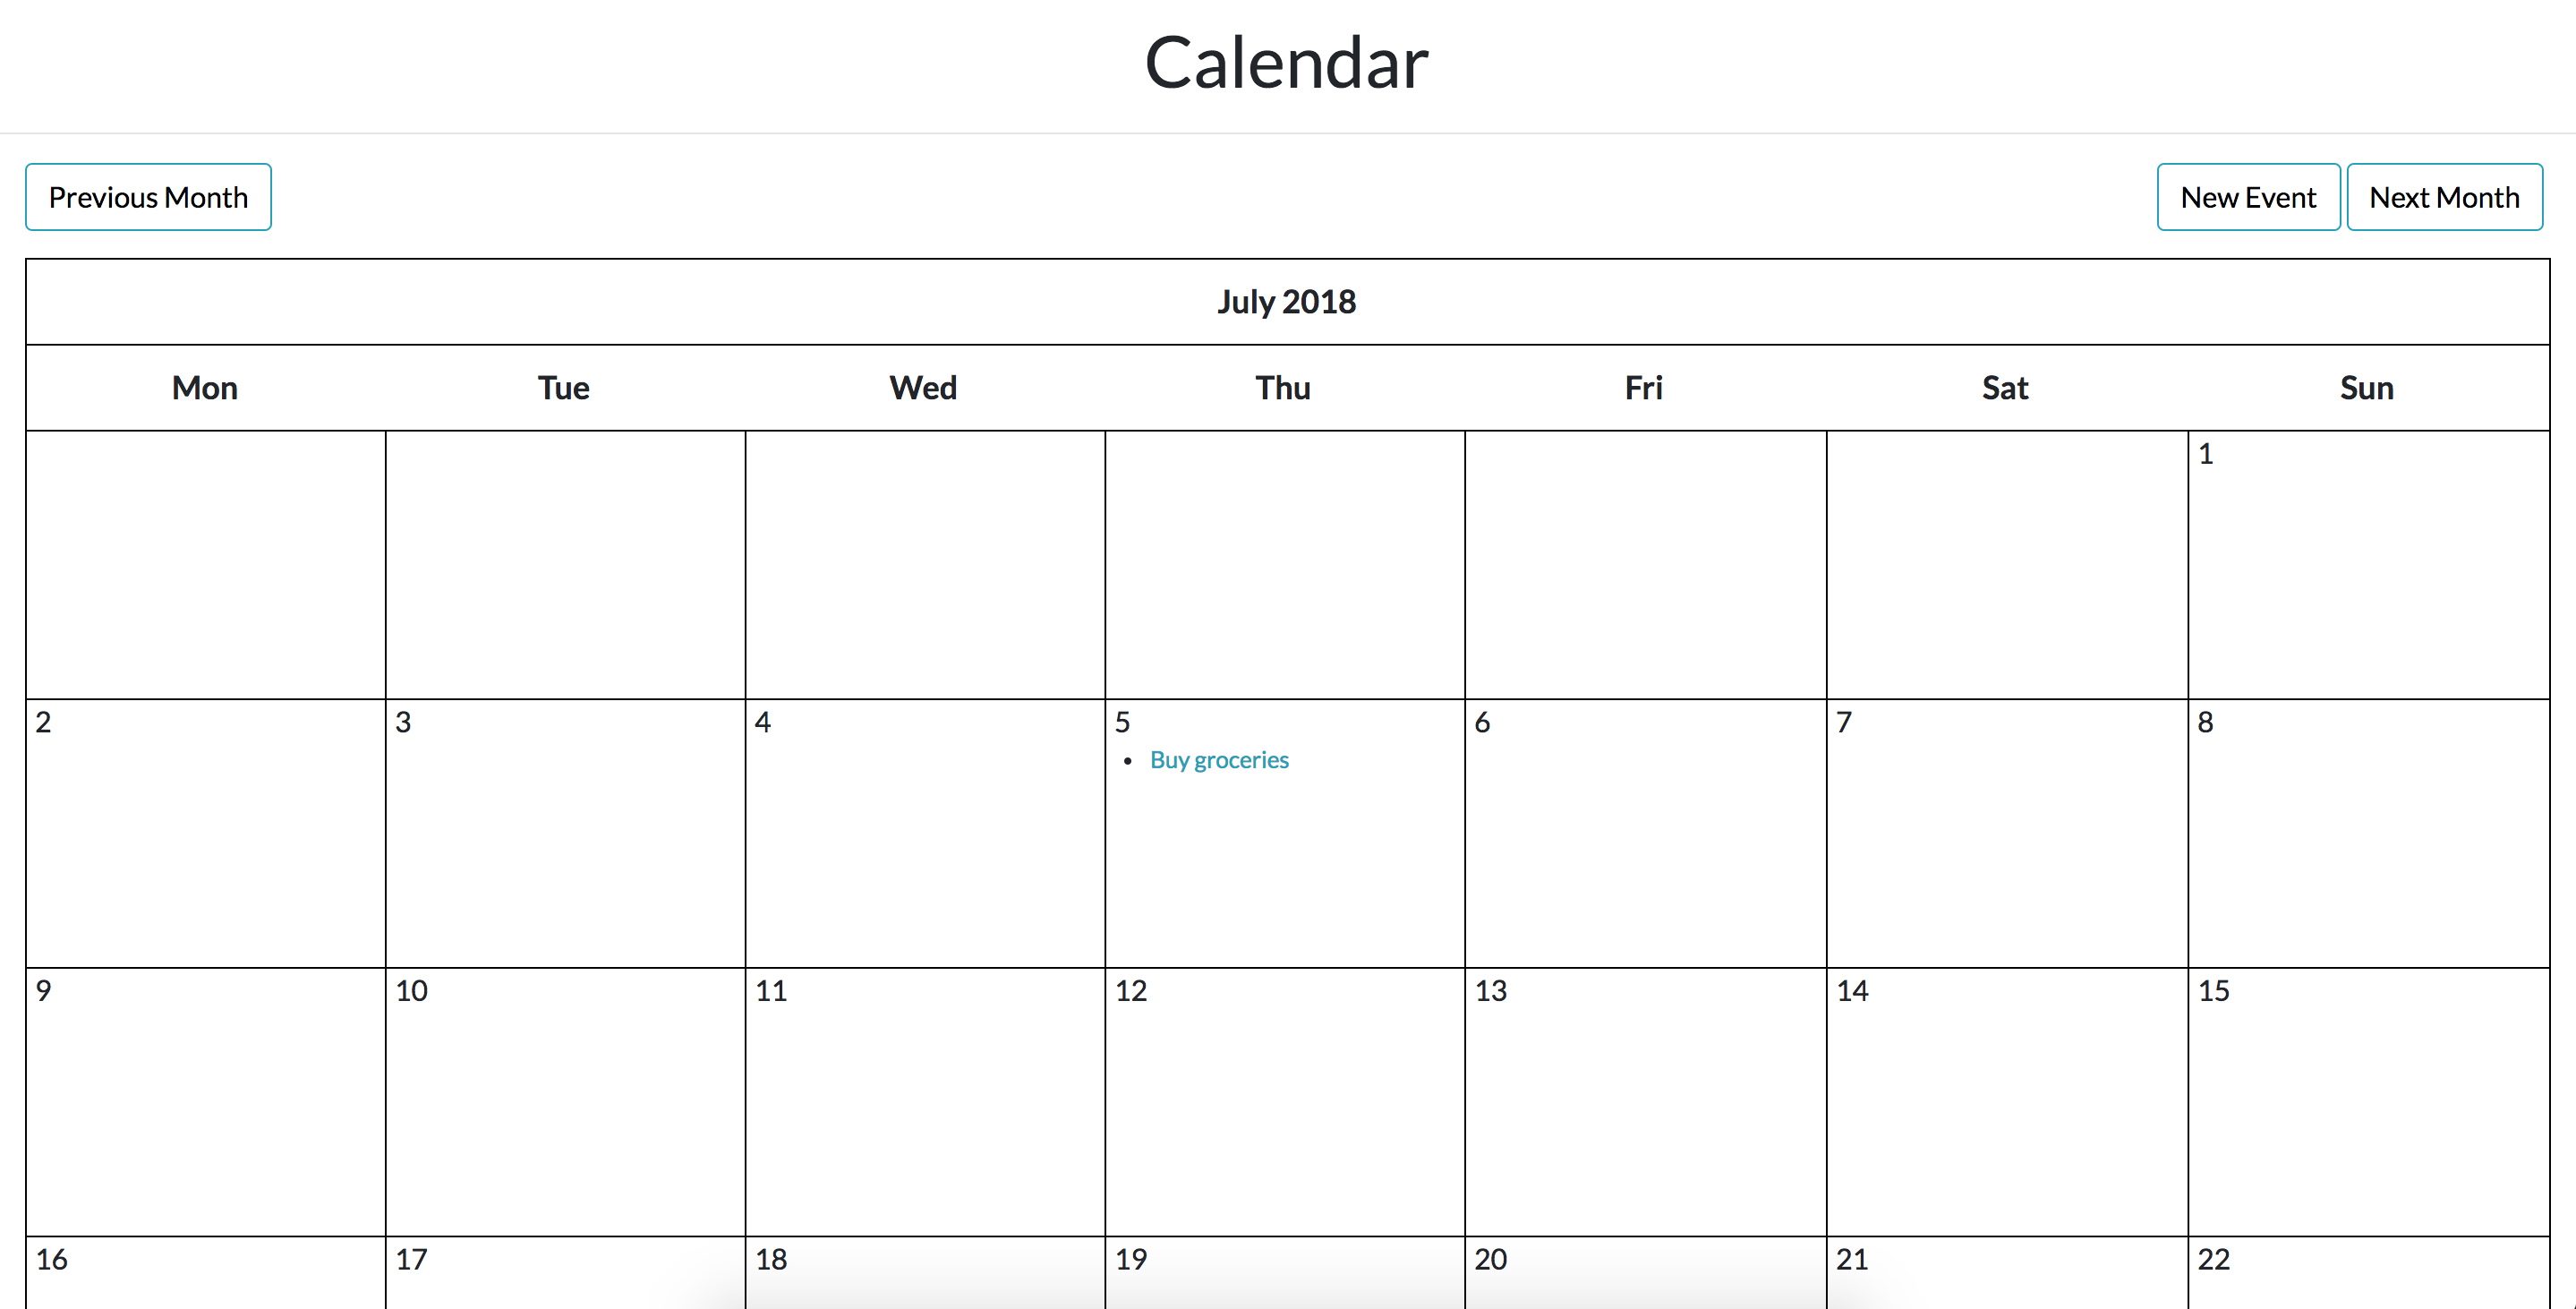
Moving on from Django Calendar Part I, we’ll add the functionality to access previous, next months and to create/edit an event!
To access other months, when we’re at the current month, we calculate the previous and next month’s date in cal/views.py and pass it as template variables to our cal/calendar.html:
# cal/views.py

class CalendarView(generic.ListView):
    ...
    def get_context_data(self, **kwargs):
        ...
        d = get_date(self.request.GET.get('month', None))
        context['prev_month'] = prev_month(d)
        context['next_month'] = next_month(d)
        return context

def prev_month(d):
    first = d.replace(day=1)
    prev_month = first - timedelta(days=1)
    month = 'month=' + str(prev_month.year) + '-' + str(prev_month.month)
    return month

def next_month(d):
    days_in_month = calendar.monthrange(d.year, d.month)[1]
    last = d.replace(day=days_in_month)
    next_month = last + timedelta(days=1)
    month = 'month=' + str(next_month.year) + '-' + str(next_month.month)
    return month
In cal/calendar.html, we use the prev_month and next_month's var as request parameters. This means that when we press on the prev/next month button, the corresponding date gets passed to request and we can get it from our views using self.request.GET.get('month', None) as shown above!
<!-- cal/templates/cal/calendar.html -->

{'% extends 'cal/base.html' %}

{'% block content %}
<div class="clearfix">
	<a class="btn btn-info left" href="{'% url 'cal:calendar' %}?{'{ prev_month }}"> Previous Month </a>
	<a class="btn btn-info right" href="{'% url 'cal:calendar' %}?{'{ next_month }}"> Next Month </a>
</div>

{'{ calendar }}
{'% endblock %}
To finish up the buttons, we add a little bit of common styles:
/* cal/static/cal/styles.css */

.left {
  float: left;
}

.right {
  float: right;
}

.btn {
  outline: none;
  color: black;
  background-color: transparent;
  box-shadow: 0 0 0 0;
}

.clearfix {
  margin: 15px;
}
When that’s done, you should be able to click on the buttons to move to the corresponding months! Now, we move on to creating an event. To do this, we need to create a form. In Django, we can use the handy ModelForm which takes all of our Event files and turns them into a form for us.
A side note here, Django datetime fields doesn’t work well with html inputs. To work around that, I’ve
- Added widgets to format the datetime fields to make them show on the html form
- Specified
input_formatsto parse HTML5 datetime local input to datetime fields
# cal/forms.py

from django.forms import ModelForm, DateInput
from cal.models import Event

class EventForm(ModelForm):
  class Meta:
    model = Event
    # datetime-local is a HTML5 input type, format to make date time show on fields
    widgets = {
      'start_time': DateInput(attrs={'type': 'datetime-local'}, format='%Y-%m-%dT%H:%M'),
      'end_time': DateInput(attrs={'type': 'datetime-local'}, format='%Y-%m-%dT%H:%M'),
    }
    fields = '__all__'

  def __init__(self, *args, **kwargs):
    super(EventForm, self).__init__(*args, **kwargs)
    # input_formats to parse HTML5 datetime-local input to datetime field
    self.fields['start_time'].input_formats = ('%Y-%m-%dT%H:%M',)
    self.fields['end_time'].input_formats = ('%Y-%m-%dT%H:%M',)
Once we have that done, we can specify an event view to handle both new events and editing current events. event_id represents the id of the event to update. If it exists, we know we want to use that object and if it doesn’t we want a new object.
# cal/views.py

def event(request, event_id=None):
    instance = Event()
    if event_id:
        instance = get_object_or_404(Event, pk=event_id)
    else:
        instance = Event()

    form = EventForm(request.POST or None, instance=instance)
    if request.POST and form.is_valid():
        form.save()
        return HttpResponseRedirect(reverse('cal:calendar'))
    return render(request, 'cal/event.html', {'form': form})
To make that work we need to update our urls. Here we specify two urls. One to call when we want to create a new event and another when we want to edit:
# cal/urls.py

urlpatterns = [
    ...
    url(r'^event/new/$', views.event, name='event_new'),
    url(r'^event/edit/(?P<event_id>\d+)/$', views.event, name='event_edit'),
]
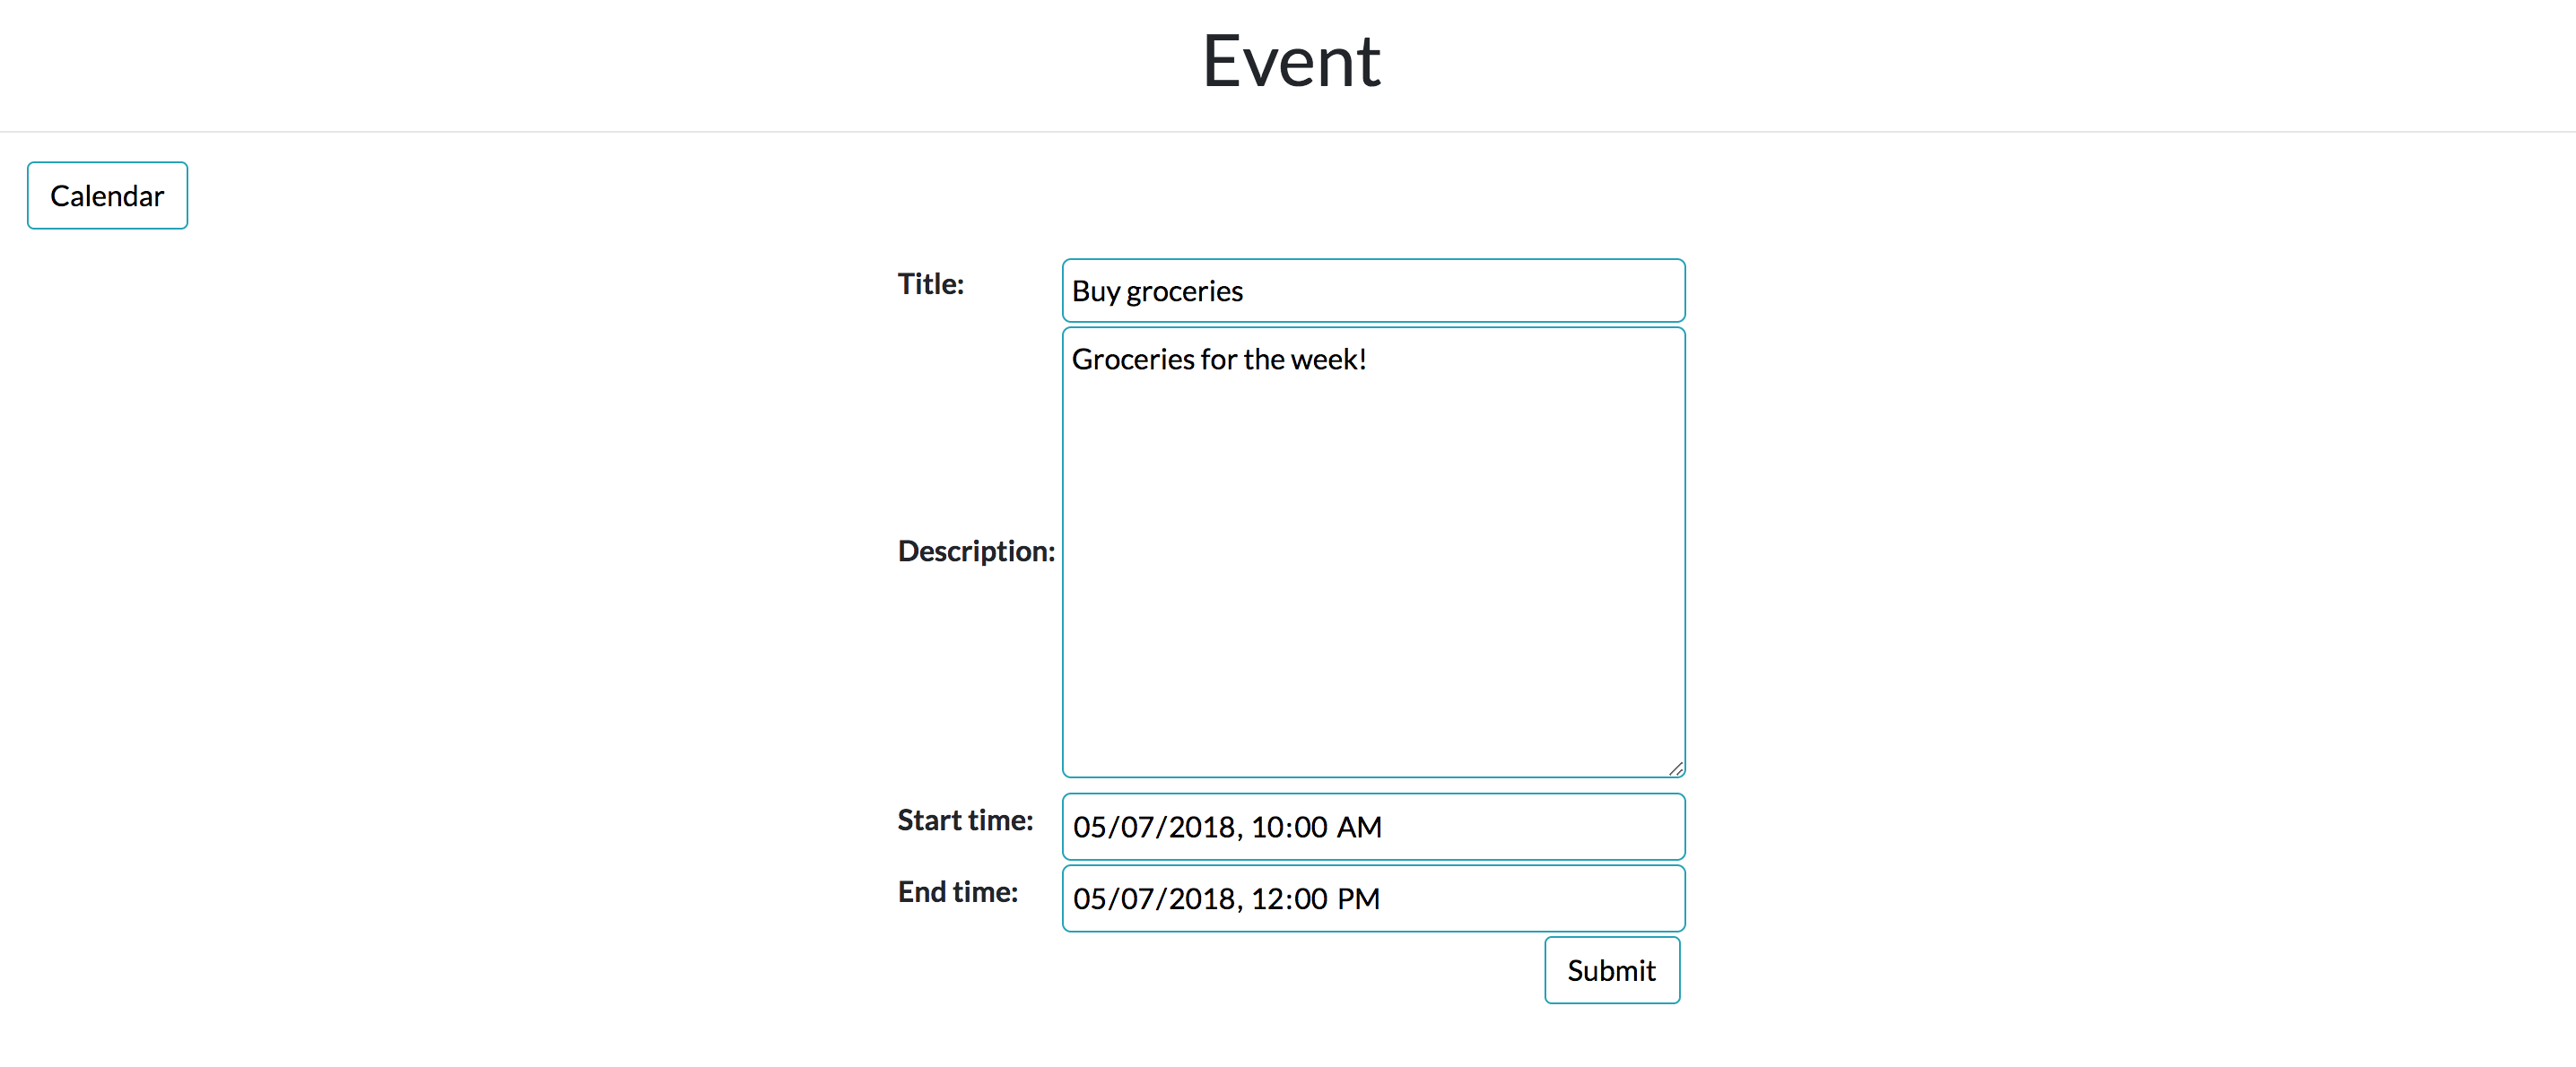
To use the above, we create a new template for the form. We first declare the title of the page, followed by a link back to the calendar, and the form itself:
<!-- cal/templates/cal/event.html -->

{'% extends 'cal/base.html' %}

{'% block title %}
Event
{'% endblock %}

{'% block content %}
<div class="clearfix">
  <a class="btn btn-info left" href="{'% url 'cal:calendar' %}"> Calendar </a>
</div>

<form method="post">
  {'% csrf_token %}
  <table class="form form-table">
    {'{ form }}
    <tr><td colspan="2"><button type="submit" class="btn btn-info right"> Submit </button></td></tr>
  </table>
</form>
{'% endblock %}
Adding a bit of style to the form:
/* cal/static/cal/css/styles.css */

.form {
  margin: auto;
}

.form input, .form select, .form textarea {
  border-radius: 5px;
  border: 1px solid #17a2b8;
  outline: none;
  background: none;
  padding: 5px;
  width: 100%;
}
Lastly, to make sure we can edit our event, we create a handy link in our event model:
# cal/models.py

from django.urls import reverse

class Event(models.Model):
	...
    @property
    def get_html_url(self):
        url = reverse('cal:event_edit', args=(self.id,))
        return f'<a href="{url}"> {self.title} </a>'
and we use this handy link in utils:
# cal/utils.py

class Calendar(HTMLCalendar):
    ...
    def formatday(self, day, events):
        ...
        for event in events_per_day:
            d += f'<li> {event.get_html_url} </li>'
aaand that’s it! You can find this project on github here. Hope you liked this tutorial!
♡, Hui Wen